

How to Replace Canon IR400IR/IR1730 Cassette Feed Repair Kit
Do you need to replace the cassette feed repair kit in your Canon image Runner 1730, 1740, 1750, 400, or 500 iF model? Does it include parts IR1730-z2 or IR400IF-Z2? If so, we can help guide you through the step-by-step process, making the replacement easy.
The following tutorial is for these models:
- Canon Image RUNNER 1730, 1740, 1750
- Canon Image Runner iADVANCE 400iF and 500iF
When Do You Need to Replace the Roller Feed Kit?
You may experience one of the common errors or compatibility issues for your Canon 400 iF, which may mean you need to replace the cassette feed repair kit. Some common errors include a paper jam displaying error codes:
- Error 000101 - Pre-Reg Sensor
- Error 000205 - Reg-Sensor
- Error 000A05 - Reg-Sensor
Another common error may be that the Pre-Registration Sensor is not turned ON within a specified period after the start of the pickup operation. Or the Pre-Registration Sensor is not turned ON after the re-pickup operation. If so, a delay jam is notified.
Step-by-Step Guide: Replacing Cassette Feed Repair Kit
Prior to starting, it is imperative to remember power off the device and disconnect from its power source at the back.
Now that you’ve identified the error and how to solve it and have followed the necessary precautions, it is time to get to work replacing the cassette feed repair kit. Follow the below step-by-step guide that will lead you through the multistep process, from removing the main tray, removing the separation roller and feed roller, removing the paper pickup roller, reinstalling the separation roller, feed roller, and paper pickup roller, and reattaching the main tray. Let’s get started!
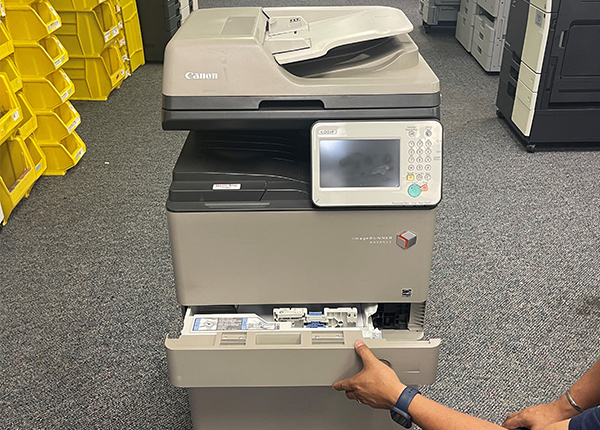
Step One: Removing the Main Tray
Begin by removing the main tray. After removing the main tray, we will follow the steps below to start removing the separation roller, the feed roller, and the paper pickup roller.

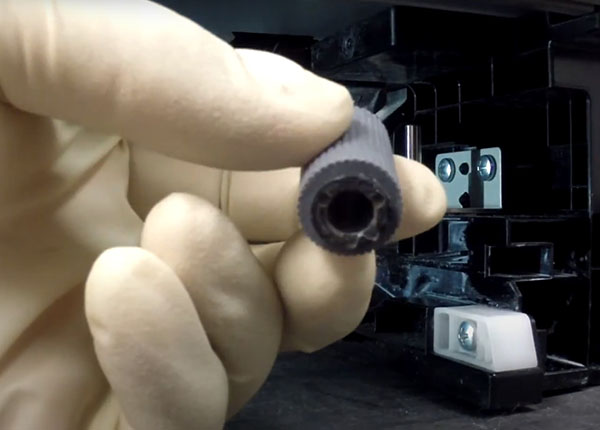
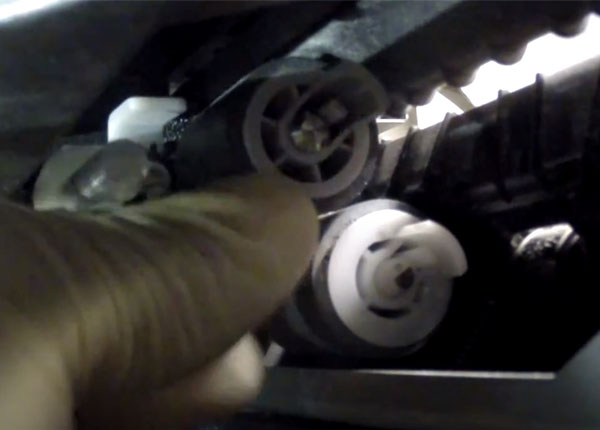
Step Two: Removing the Separation Roller and Feed Roller
To remove the separation roller and the feed roller, you must squeeze the tab in the middle of the roller. Now, you should be able to pull the roller towards you. Next, do the same for the feed roller.
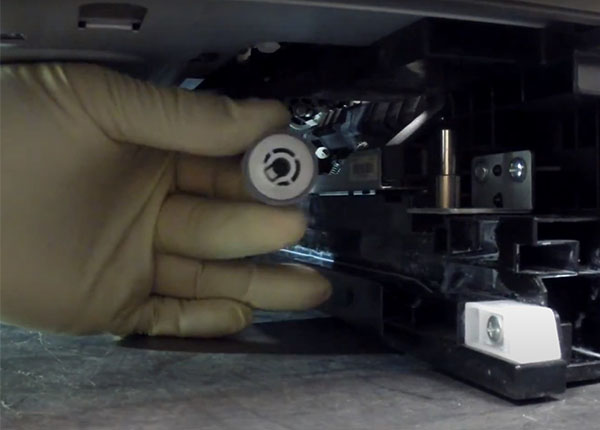
Step Three: Removing Paper Pickup Roller
To remove the paper pickup roller, first, you will need a pair of pliers or tweezers to pull out the roller stopper. Now, in the middle of the roller is a plastic tab - push the tab towards the middle, and it will release the roller.
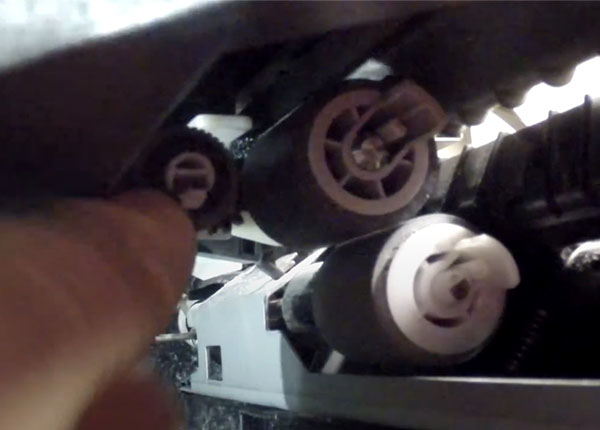
Step Four: Reinstalling the Separation Roller
Start by reinstalling the separation roller. Just slide it inside the shaft, and then you can move it back and forth to ensure it is locked in place.
Step Five: Reinstalling the Feed Roller
Next, it is time to reinstall the feed roller. Follow the same steps you took with the separation roller.
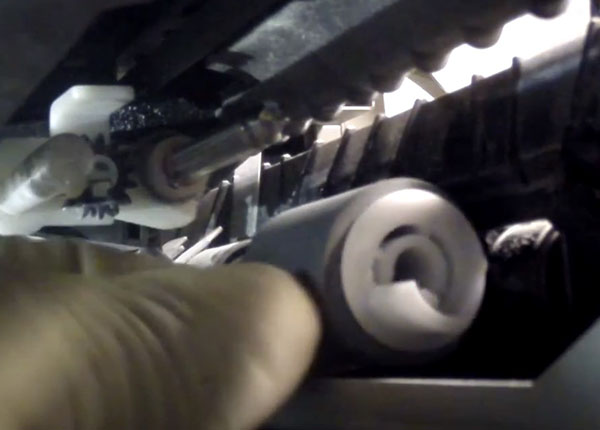
Step Six: Reinstalling Paper Pickup Roller
Then, you will reinstall the paper pickup roller like you reinstalled the separation roller. Now, we're doing the paper pickup roller. This roller is difficult because of the metal stopper. Insert one of the metal stopper tabs inside the roller first, then push the roller slightly down to enter the other side of the metal stopper on top of the white plastic shaft.
Step Seven: Reattaching the Main Cassette Tray
You will then reattach the main tray back in, and you should be good to go!
Order Your Replacement Parts Today!
Does your Canon 400 iF need any replacement parts? Find the necessary parts here, including the compatible Paper Pick-Up Roller, Feed Roller, and Separation Roller or get the entire Canon Cassette Feeder Repair kit containing all of the previously listed parts.
- DX-4751-Z2, IR1730-Z2, IR2270-Z2, IR2520-Z2, IR2525-Z2, IR2535-Z2, IR4025-Z2, IR4225-Z2, IR4235-Z2, IR4245-Z2, IR4251-Z2, IR4570KFR, IRC5030-Z2 - Canon Cassette Feed Repair Kit
- FB6-3405-000, FC7-9381-000 - Canon Paper Pick-Up Roller
- FB6-3406-000, FC0-5080-000, FC5-6934-000, FC6-7083-000, FC7-9502-000 - Canon Feed Cassette Roller
- FC6-6661-000, FE2-0609-000 - Canon Separation Roller
Follow Us on YouTube for More Tutorials
Thank you for completing this step-by-step tutorial! We hope you found it useful. Remember to stay connected with us by following our YouTube channel and subscribing for more important content. We would love to hear from you, so please leave a comment.
Click here to view Item, Inc. YouTube channel.
Need More Help?
If you need more assistance, contact us. For sales, repair, or unsure about a part, call us, use our chat feature, or email us. We're here to help in any way!